Tuesday, June 4, 2013

TECHNIQUES IN CHOCOLATE

June 4, 2013

The focus today was finalizing the design for the showpiece. We decided on an under the sea themed piece with a seahorse as the focal point.  The guideline for the piece had to be approximately 3 feet high by 1 to 1-1/2 feet wide.
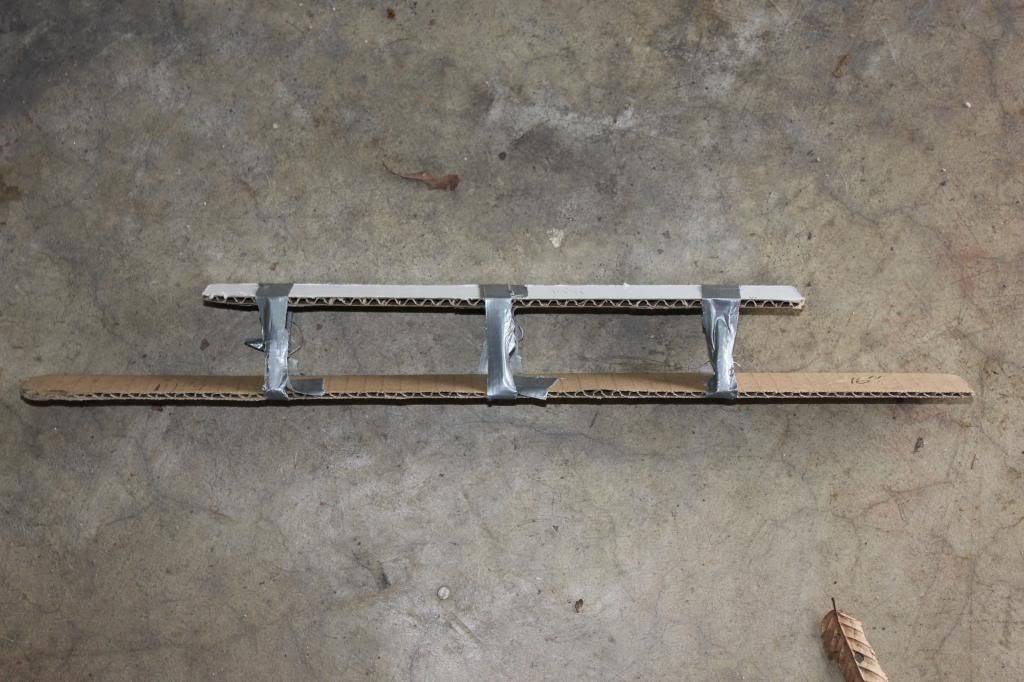

Once we had a good grasp on what the design would be, we were tasked with creating a mock up out of cardboard and duct tape.  This allowed us to see if our design would actually work and help determine what structural elements were required for the piece.

After completing our mock up, we decided to test our main structural piece which was to be a tall 2 foot tall coral structure that the seahorse would attach too. We attempted two different techniques in small scale to try obtain the structural element and desired effect.  Unfortunately both methods were unsuccessful.  It was the end of class and we now had to come up with a new design for our piece that we would not be able to mock up or plan like our original design.


Monday, June 3, 2013

TECHNIQUES IN CHOCOLATE

June 3, 2013

This week the focus was on a chocolate showpiece.   A showpiece is a much larger scale display than the centerpiece we covered in the first week of chocolate. We started the day by learning  different decorating techniques and ways to spread chocolate that can be used for the showpiece. We then separated into teams and brainstormed on ideas for our showpiece that we would be creating this week. 

Thursday, May 30, 2013

TECHNIQUES IN CHOCOLATE

May 30, 2013

After making molded candies yesterday, we moved on to other chocolate confections such as truffles and candied orange peel. My team was assigned to make marshmallow. This was a good learning experience for me as I completely messed up the first batch and had to make it over again.


What I learned was that you beat the egg whites with only a little bit of the granulated sugar.  I poured all the granulated sugar into the egg whites. This does not allow the egg whites to whip up to the proper consistency.  Also the formula required water and sugar be heated between 240 and 265 degrees.  I put the corn syrup in the water and heated the mix. Without having any of the granulated sugar in the water mixture, the mixture simply just boiled down and would not reach the required temperature.  


Second time round, a small amount of sugar went into the egg whites, the rest into the corn syrup, water mixture and everything turned out great in the end.  It tastes just like the marshmallows bought from the store. 


I also was able to work with gelatin sheets, which I have never used before. These were soaked in water for 5 to 8 minutes and then once the sheets absorbed the water, the water was squeezed out by hand and added to the egg white, sugar syrup mixture.  


After the marshmallow was made and piped, we moved on to the next chocolate. We took some of the hazelnut ganache that was left over from yesterdays chocolates  candies and mixed with more chocolate. Then we piped them into strips on a tray and added a macadamia nut to the top. We tempered more dark chocolate. Then rolled the piped ganache in the chocolate, removed with a dipping fork on to a parchment tray, and applied a transfer sheet strip on top. Removing the ganache from the chocolate with the dipping fork and placing on the tray without it having feet (excess chocolate that forms at the bottom when placed on the tray) or marks all over the chocolate was quite a challenge. After doing a tray full though, I was beginning to get the hang of it. 

Different candies, truffles, and other confections were made by each team and in the end we had a wide variety of chocolates. 

Pistachio Covered Truffles, Chocolate Clusters, and Pona (Orange Cream-Filled Chocolates) 


Chocolate Covered Orange Peel and Coconut and Almond Covered Truffles


Samba (Anise Ganache and Nougatine), Vioni (Milk Chocolate and Vanilla Square), and  Nut Clusters (nitrogen mist in background)

Havana (Milk Chocolate  Rum Ganache), Caravelle (Marzipan, Raspberry and Hazelnut Chocolates), and Seville (Milk Chocolate, Hazelnut, and Orange Ganache Chocolates)


A chocolate display was created for the window and of course we were each able to take some home to enjoy.


Wednesday, May 29, 2013

TECHNIQUES IN CHOCOLATE

May 29, 2013


We were in the kitchen making chocolates. Each team was assigned a different chocolate to make. We started by selecting the chocolate mold we wanted to use to make our chocolates.  My team was assigned the Faun which is a Hazelnut Ganache Chocolate. As our formula made 56 candies, we selected 3 different molds to make the chocolates (each mold only having 24 candies).  


The process for making chocolates was first to temper the chocolate.  The formula called for dark chocolate. Each chocolate (dark, milk, and white) has a different tempering temperature.  For dark chocolate, we melted the chocolate on a low temperature (double boiler), warmed it to 118 degrees, and then used the seeding method to temper the chocolate down to 89 degrees. This involves adding small pieces of unmelted chocolate to the melted chocolate and stirred until you reach the tempered temperature (it is 2/3 melted chocolate to 1/3 unmelted chocolate ratio). 

Two lessons learned here regarding the chocolate for making chocolate confections:

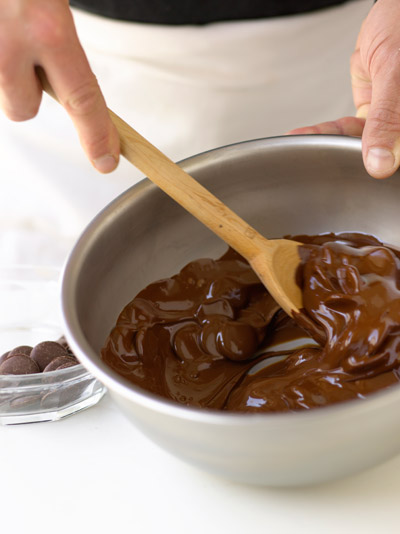
1. The chocolate must be a very smooth consistency. If using the seeding method, make sure your seeds (the unmelted chocolate) are cut into small bits and added immediately after you reach 118 degrees to ensure they will get completely melted to a smooth texture.  We left the seeds whole as shown in this picture and did not add them all right away.  This results in us fishing out the unmelted seeds out of the chocolate and not having as smooth of texture as needed.

2. The best method to use for tempering chocolate for chocolate confections is the block method.  This is where an unmelted block of chocolate is added to the melted chocolate and stirred until it reaches the tempered temperature. This pretty much ensures a smooth texture and once you reach the tempered temperature, you just remove the remaining portion of the block. 

After our tempered chocolate was ready, we poured it into the mold.  Once each mold is filled we scrapped the excess chocolate off the top and sides of mold.  After waiting for a minute, we then dumped the chocolate out of the mold back into the bowl and then scraped the top off again while holding upside down. We then placed the mold upside down on a parchment paper.  This creates a thin lining of chocolate on the inside of the mold and creates a small ridge at the base where the chocolate sits on the parchment.   After this dried, we turn the mold over and scrapped any remaining chocolate off the top of the mold.   


The mold was ready for filling. We made the hazelnut ganache by melting milk chocolate and mixing in a hazelnut paste. As we need to use the tempered chocolate to complete the chocolates, we had to continue to keep the tempered chocolate in temper until we were ready to complete the chocolate molds. This is not allowing the chocolate to fall below 83 degrees or warming above 90 degrees. 


As soon as the chocolate hazelnut filling was cooled, we filled the chocolate molds by piping the filling into the chocolate lined molds up to 1/16 of the top of the mold.  Then waited for the filling to set.


After the filling was set we poured the tempered chocolate over the filled molds and then scrapped the excess chocolate off the mold.  


After the chocolate set, we scrapped the mold one last time to remove any excess chocolate on the mold. Then we turned the molds over on to a parchment tray.  We lifted the mold and hit it hard one time down on the tray and the chocolates fell out. The process for making chocolate candies was messy and by the end of the class, my arms were very tired from continually stirring chocolate. I basically  stirred and warmed chocolate for 4 hours with a few little breaks in between.  

Tuesday, May 28, 2013

TECHNIQUES IN CHOCOLATE

May 28, 2013


We discussed  Cacao trees, their pods and beans. The trees are grown in area that are between 10 degrees north and south of the equator. Each cacao pod contains 40 to 50 beans. It takes approximately 110 to 150 beans to make 1 pound of chocolate.


We also discussed the eleven steps of chocolate production, from harvesting to final shaping.   Once we reviewed the steps of production, we moved on to chocolate truffles and the procedures for making truffles. Tomorrow we will be making truffles along with other chocolate confections. 


Monday, May 27, 2013

TECHNIQUES IN CHOCOLATE

May 27, 2013

Today I made Chocolate Butter Cupcakes with Butter Cream Frosting, yum!


Thursday, May 23, 2013

TECHNIQUES IN CHOCOLATE

May 23, 2013

We completed assembly of the chocolate centerpiece.  First we started by tempering dark chocolate and assembling the base structure. 


Then we tempered white chocolate and assembled the flower and made leaves.


We then assembled and added the pedestal to the base structure for the flower to attach.


The Chef then sprayed the structure with a chocolate coating to smooth everything out. 


It was then set aside for the coating to dry. 


While waiting we completed other elements for finishing the centerpiece. These pieces were made of white chocolate and colored cocoa butter.


After the coating was dry we attached the flower to the pedestal.


Then the finishing elements were added for completion.


The completed centerpieces were put on display in the window.